 In my last article, It’s Hip to be Square, I discussed how important it is to start your project with a set of square reference lines. If your reference lines are out of square by even one degree, problems can increase exponentially as you complete your project.
But square isn’t the only important factor; woodworking and renovation projects that aren’t level or flat can also be problematic.
The term “level” refers to a straight line that is also perfectly horizontal. It is typically referenced on one axis, or straight line, such as the top of a picture frame that hangs on a wall. A tabletop can also be considered level but it has two axes: X and Y, or north/south and east/west.
There are many ways to measure level—laser, digital, optical transit, libella (an ancient tool), and even water—but the most common tool is a level. A level references only one axis, and can be used to check if a picture is hanging correctly, if a wall is leaning in or out, or if a table is completely flat.
Using a level sounds simple, but human interpretation (or my eyesight), inaccurate tool manufacturing, and misuse can throw off your reading, which can cause all sorts of problems with your job. That’s why it is important to own and use an accurate level for your construction and woodworking projects.
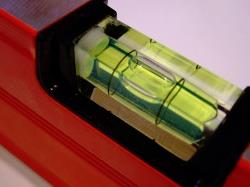
A level is most often a straight bar made of wood, metal or plastic; in the middle is a glass vial filled with mineral spirits that also contains a small air bubble. The vial has two lines drawn around it, separated by the length of the bubble. When the level is placed on a surface and the bubble rests exactly between the two lines, the surface is level.
Levels often have at least two vials set, each oriented 90 degrees from one another. The one in the center is used to measure a horizontal axis. The second bubble vial, typically set toward one end, is used to determine a vertical axis, called “plumb”.
Some levels have the vial offset to one side, as shown in the illustration. This allows you to see the vial easily from the top as well as the side. With this offset vial, only one edge (the bottom and opposite side) is typically used as the reference edge. Some levels have the vial in the middle, which you can see from the side; this configuration allows you to use both sides of the level as a reference edge. The final type of level has a third bubble vial set at 45 degrees, but I rarely use this one.
As I mentioned earlier, plumb means straight up and down. Levels are good for measuring plumb. But a better tool to find this measurement is a plumb line or plumb bob, which is a string with a weight. This tool has little room for error and uses gravity to create a perfect straight up and down plumb line.
Plumb bobs take a lot more time to use. To get an accurate reading, the plumb weight must stop swinging back and forth and become completely still. I often use a level for a quick reference to measure plumb to quickly see if a wall or surface is leaning in or out. If it shows that it is considerably out of plumb, I will then use my plumb bob to verify the measurement.
Levels come in a variety of sizes, materials, and tolerances, with a price tag that often directly relates to quality and accuracy. The most common levels are two-foot and four-foot levels, and torpedo levels, which are short ones, typically nine to 12 inches long. Torpedo levels usually come with a magnetic strip on one side so they can be used hands-free on metal surfaces, such as steel posts or appliance frames.
Levels are also used to determine flat. If a surface is slightly bowed or curved, as many often are, then checking for level can be nearly impossible. As a general rule, I use the longest level to get the best overall reading.
When placing a level on a surface that is not flat, it will either rock back and forth on a high spot or leave a small gap under its center. This situation is often missed, so it’s important to look carefully under the level’s edge for gaps caused by dips in the surface.
Additionally, when measuring a plain large panel or surface such as a floor or table, you have to check both the X and Y axis, as well as everything in between. I check those two measurements, then crisscross 45 degrees and look for isolated dips or humps on the surface.
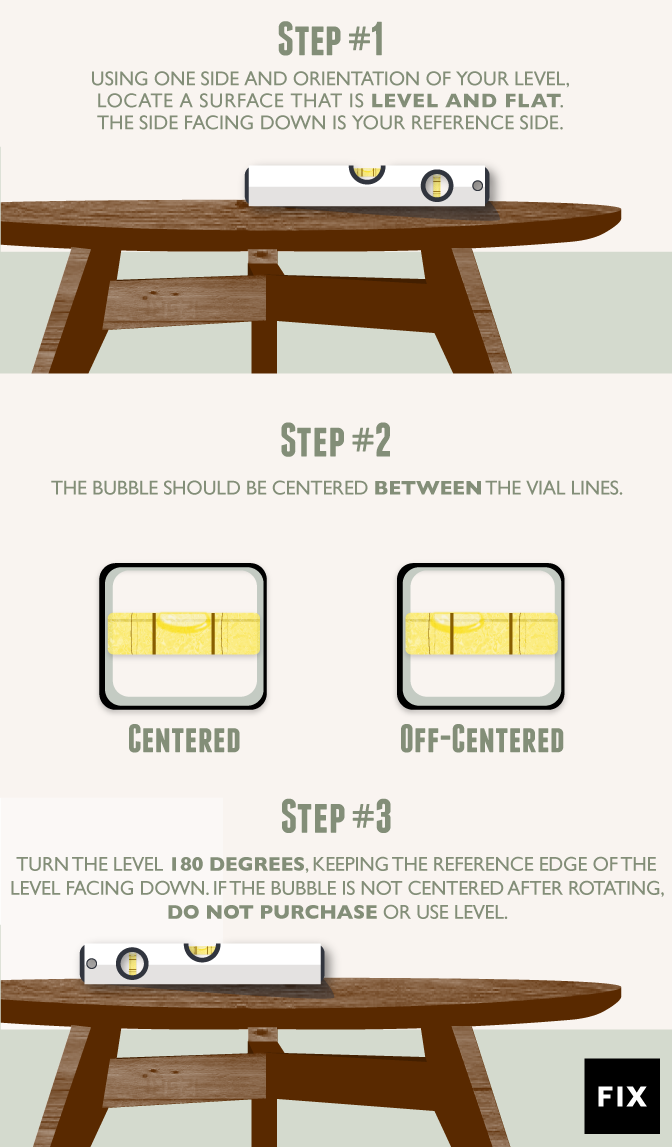
Unlike most square tools, levels cannot easily be fine-tuned or adjusted, and should be tested before purchasing and regularly afterwards as well. To test if a level is accurate, you need to test it against itself, for each vial for horizontal and vertical planes, and at 45 degrees.

Source: Fix.com
When you test, check the bubble and see if it is still between the lines. It may be slightly off, so your level will not be accurate. If your level has a middle vial, check the other edge using the same process.
Side note: On middle vial levels, there are times when one side is accurate and the other is not. This has to do with an asymmetrical vial. Often professional contractors will write “NO” or “OFF” on that side and only use the good side.
A good, accurate level is a precision tool and should be treated as such. Don’t drop it and make sure you keep it out of direct sunlight, which can affect accuracy. Carrying cases such as rigid plastic tubes offer extra protection for longer levels.
If a level falls out of level, it can be modified by adding a few layers of tape on one end, which raises the low side. More expensive levels can have the vials reset to dead level.
