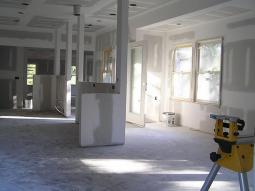
 Drywall projects are often on the task list of avid DIY homeowners. Whether you’ve just moved into your home and want to make some changes or you’ve been in your home for a number of years and need to make some minor repairs in your drywall, these helpful tips will guide you in the right direction.
Gather the necessary supplies. Before you can start the installation, you need to gather the necessary tools for the job. This includes items like a drywall T-square for straight-edge cutting as well as measuring, a hammer, drywall nails or screws, and spare blades. It’s also important to get the right thickness of drywall. How your wall is framed will determine the type and thickness of the drywall you’ll need. Then, determine how much drywall you’ll need. This of course depends on the size of the project.
Use the right tools. To make things easier on yourself during your drywall installation, use a lightweight putty knife as opposed to the heavy drywall troughs that professionals use. Don’t forget fiberglass drywall tape, which will adhere to surfaces easier and make project clean up a breeze. This tape can be used for a number of other projects throughout your home, so it’s also a good tool to have around.
Cut the drywall boards on a flat, dry surface. Measure the length of the drywall that you’ll need and mark the area that needs to be cut with a pencil. Whether you want to cut all of the pieces before you begin hanging them or cut as you work, it is recommended that you measure twice and cut once. As a general rule, you’ll waste less material and avoid mistakes if you cut as you go.
Start from the top and work down. Apply construction adhesive to the wood studs used to frame the ceiling, then affix the sheet of drywall and hammer in nails or screws. If sizing is necessary, use the T-square to determine where the sheet needs to be cut. Install the sheet of drywall horizontally to avoid error. Then, using a utility knife, score the sheet of drywall and break off the piece you need. Sand or scrape off any excess drywall sheet, then apply to the wall. Start with the ceiling, working your way down the walls to the floor to avoid measuring mistakes.
Fill and finish properly. This is one of the most commonly misunderstood steps in the DIY drywall process. The final steps require taping, sanding, and finishing the drywall. The best way to go about filling (also known as spackling) is to do so in a careful and clean manner. This is known as the tape coat. The next step is to apply a second layer of compound, called the mud coat. Create thin layers of the paste, starting in the corners, holding the putty knife at a low angle and working your way outwards until the walls are evenly covered. To properly finish the drywall, apply a sealer or primer coat to protect the finished product.
If tackling a DIY drywall project seems like too big a task, contact the experts at CertaPro Painters of Cape Coral.
