
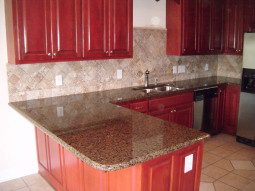
 Bare walls or ugly counters not taking the heat in that kitchen, bath, or utility room? Installing a tile counter, wall, or backsplash is easier than ever with the new TileMatSet product by Bondera. Don’t stick it out— stick beautiful tile on top of it!
Cut and stick this strong, double-stick, adhesive backing to a surface, press tiles into place, grout the seams, and presto – finished! No need to tear out existing substrates, or get out that thinset and trowel. Just grab some tile and a roll of Bondera TileMatSet at a home improvement retailer near you, and install tile in one day with these do-it-yourself steps …
You Will Need:
Tiles, Bondera TileMatSet Wall (or Bondera TileMatSet Counter), White Powder Grout, Ruler, Measuring Tape, Utility Knife (or scissors), Permanent Marker, Rubber Grout Float, Grout Sealer, Bondera Wet Seam Tape (for wet areas only)
Important: Bondera’s adhesive is only as strong as the substrate it is bonded to so make sure all surfaces are in good condition, flat, clean, and dry. The only place you can’t use this product is on floors.
1. MEASURE
First, measure the length and width of the wall you plan to tile.
2. CUT BONDERA
Use a ruler and marker to measure out a manageable length of Bondera TileMatSet, using a utility knife (or scissors) to cut it. Note: If using a utility knife, be careful to cut on top of a mat or other protective surface.
3. EXPOSE BACKING
Locate the sticker tab inside the core of the TileMatSet. Stick the tab diagonally across the corner of the non-grid side. To expose the adhesive backing, pull the tab diagonally away from the corner while holding the tip of the other side (grid side) until two to three inches is exposed.
4. APPLY
Align the exposed adhesive and press firmly against substrate (grid side up). Pull away a few more inches of the liner while pressing the adhering TileMatSet with the grout float (or your hand). Repeat until entire length is firmly adhered. (Note: If the tiles will be in a wet area, like a shower or behind a sink, apply Bondera Wet Seam Tape according to packaging directions). Repeat steps one through four until all area to be tiled is covered by TileMatSet.
5. EXPOSE GRID
Use a sticker tab to pull away all grid-side backing. Measure and mark tile guide lines using a permanent marker.
6. PRESS ON TILE
Use these guidelines and spacers to align each tile before pressing it onto the grid of the Bondera TileMatSet. Press and hold each tile for five seconds using the grout float (or one hand).
7. GROUT
Use a grout float to apply grout within eight hours of tiling. Wipe away excess with a sponge. Once the grout dries, use a towel to polish the tiles clean. (Note: If this surface will get wet, seal grout by applying grout sealant according to manufacturer’s directions.)
Bondera could be the answer to many a remodeling dilemma. Tired of that plain wall, laminate countertop, or metal backsplash? Any clean, smooth surface can be tiled over using Bondera TileMatSets. Have fun, and happy tiling! The floor’s the limit!
Regent Property Group enjoys sharing these and other helpful household tips with homeowners. Searching for an Austin-area luxury property for sale? The REALTORS® at Regent Property Group support home-buyers every step of the way. From waterfront mansions to downtown condos, we’ve got you covered!